Leveraging “Labels” in Autodesk Vault
By John Hackney, IMAGINiT Technologies
CAD/CAM/CAE Autodesk CAD design Imaginit Technologies John HackneyArchiving “as shipped” versions of machine design projects using Autodesk Vault labels.
Many manufactures have clients that require their machinery to be updated from time to time. Or, they may want a set of prints for a machine that was shipped in months or years past. Either case requires the manufacturer to maintain a complete “as shipped” set of files for the client’s machine.
This can be a nightmare with a Windows-based archive system, where final “as shipped” files are typically copied out to a protected folder and the project parts are stored to other folders for use in other projects.
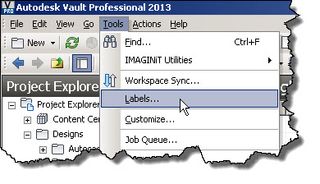
In an Inventor assembly, if this copy is not done correctly, the “as shipped” assembly will be destroyed. However, all versions of the Autodesk Vault have a built in tool that makes this task very easy. It is located under the Tools menu drop down and is called Labels.
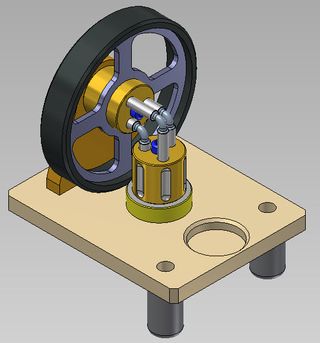
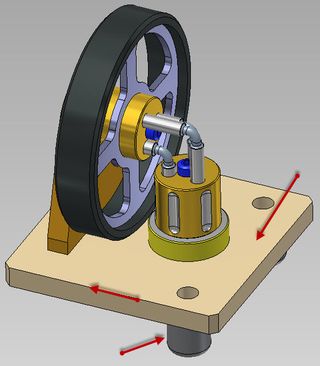
We are going to make a Label for an “as shipped” Inventor assembly with parts and drawings to show the process. The assembly is a small steam engine as shown below.
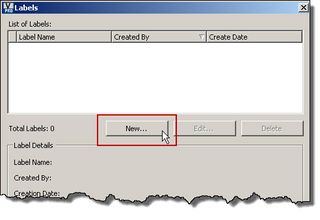
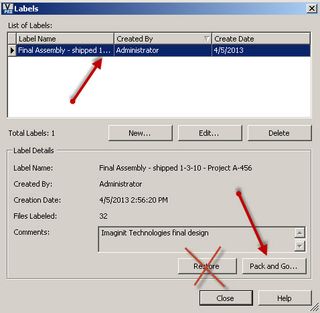
Select the Labels tool to open the Label dialog box. Select New to create a new Label.
Select the Vault browse button and navigate to the folder containing your top level assembly. Normally you will have the parts and drawings belonging to the assembly in the same folder but it is not necessary. If parts exist in this assembly from other machines and folders, that is not a problem.
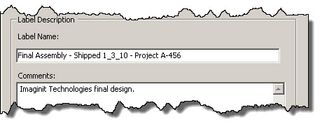
Next give your label a very descriptive name and a full description. You may know what the label represents now but in a few months or a few years it will be gone from your memory. Select OK and then close the Label Dialog box to finish.
Time passes and you may modify some of the parts used in the assembly or maybe even changed the top level assembly itself for another job. With the Autodesk Vault, you do not need to think about preserving the status of the “as shipped” job because of the Label you created when it was shipped.
This assembly has been changed over time in three ways: The base has been shortened, the recessed pocket has been removed and the posts on the bottom of the base have been shortened.
The client calls up and asks to get a complete set of files for the “as shipped” machine. Go back to the Label dialog box and select the label previously assigned when the machine was shipped. Select the Pack and Go button at the bottom of the dialog box. This will collect all the files bookmarked with the Label and export them to a folder of your choice.
A warning here: Normally, do not use the Restore process since this will restore the Autodesk Vault files back to the date the label was created. Without proper preparation, this could be problematic.
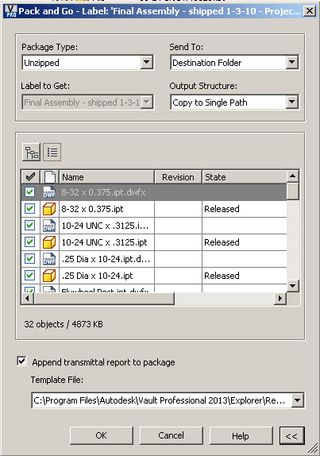
Configure the Pack and Go dialog box as you desire and select OK to continue.
Then, point to a folder inside your current project workspace that you can be sure and identify as previous data and not get it confused with current design. It is recommended to “Copy to a Single Path” to make it easier to manage.
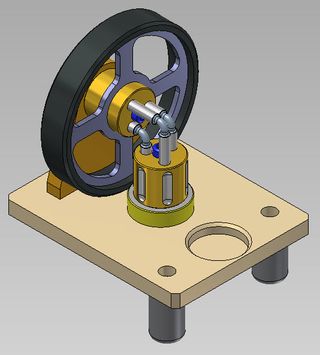
Opening the restored model you can see the original “as shipped” model has been re-created.
This article originally appeared on IMAGINiT’s Manufacturing Solutions blog.
http://blogs.rand.com/manufacturing/
 John Hackney is a mechanical application engineer at Imaginit Technologies with 25 years experience in the manufacturing industries including converting machinery, high speed pick and place, packaging machinery, and waste incineration equipment. He has served as CAD manager, designer, quality control checker, and engineering manager. He has also taught both secondary and community college level courses, including Industrial Technology, Drafting and Design and various CAD applications.

